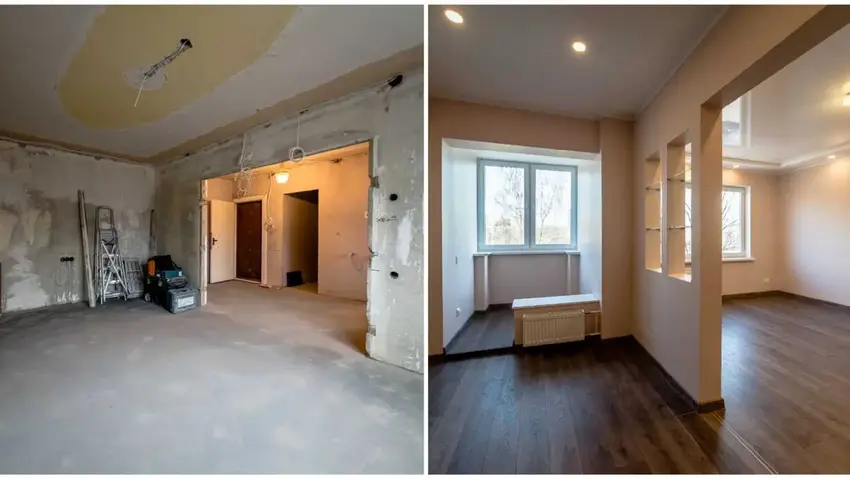

I have painted kitchen cabinets for more than 15 years. I have worked on oak, maple, MDF, laminate, and even old metal cabinets. During many apartment renovation Dubai projects, homeowners ask me the same question: Can you paint kitchen cabinets without sanding?
The answer is yes—but only if you use the right products. Sanding and primer help paint stick to the surface. If you skip them, you need a liquid deglosser and a high-quality bonding cabinet paint. These products help the paint stick well and give you a strong, long-lasting finish. If you’d like, I can also make it sound more conversational and human, like an experienced painter sharing personal advice.
Follow these 7 steps exactly, and you will finish this project in a weekend with a factory-smooth result.
First, Match the Paint to Your Cabinet Material
Nine out of ten failed cabinet paint jobs fail because someone grabbed regular wall paint. Wall paint stays soft. Cabinets take fingernails, grease, steam, and slamming doors. You need a cabinet-grade enamel – and the exact type depends on what your cabinets are made of.
Do this test first: open a door and look at the edge and the back. Solid wood shows grain that wraps around edges. Laminate shows a thin plastic skin with a visible seam. Thermofoil looks like seamless vinyl wrapped over MDF.
Paint Selection Table by Cabinet Material
| Cabinet Material | Best Paint Type | Why It Works | Extra Note |
| Solid wood (maple, cherry, birch) | Waterborne alkyd/urethane enamel (e.g., Benjamin Moore Advance, Sherwin-Williams Emerald Urethane) | Self-levels like oil paint, cures rock-hard, cleans up with water | The easiest surface. Deglosser alone preps it. |
| Oak (open grain) | Waterborne alkyd enamel | Same hardness, flows into grain | Accept the grain texture, or fill it with grain filler first. Paint won’t hide oak grain. |
| MDF / painted cabinets | Acrylic cabinet & furniture enamel (e.g., Rust-Oleum Cabinet Transformations, Valspar Cabinet Enamel) | Bonds well to existing paint; flexible enough for MDF movement | Seal any exposed raw MDF edges – they drink paint like a sponge. |
| Laminate | Bonding cabinet enamel (e.g., INSL-X Cabinet Coat, Beyond Paint) | Formulated to grip slick plastic surfaces | This is the one material where I still recommend a bonding primer if the laminate is very glossy. Test a hidden spot first. |
| Thermofoil (vinyl-wrapped) | Bonding acrylic enamel | Grips vinyl without solvents that melt it | Only paint if the foil is fully intact. Peeling thermofoil must be repaired or replaced first. |
| Metal | Acrylic enamel or DTM (direct-to-metal) paint | Resists chipping and rust | Degrease aggressively — metal hides invisible grease films. |
Which Sheen Should You Pick?
- Satin – my go-to. It hides small imperfections, wipes clean, and looks current. Perfect for older cabinets with character.
- Semi-gloss – the traditional kitchen choice. Maximum wipe ability, but it highlights every dent and brush mark. Choose it only for smooth, flat-panel doors.
- Matte – Beautiful, but harder to clean. During a kitchen renovation, it’s usually best to skip this finish if you have a busy family kitchen.
Pro rule: the higher the sheen, the more every flaw shows. Textured or dinged cabinets? Go satin.
Your Complete Tools & Materials List

Gather everything before you start. Nothing kills momentum like a mid-project hardware store run.
- Cabinet enamel paint (1 gallon covers a typical 10×10 kitchen with two coats)
- Liquid deglosser (this replaces sanding – Klean-Strip or Jasco Easy Liquid Sander work brilliantly)
- Degreaser (TSP substitute or Krud Kutter)
- 2-inch angled synthetic brush
- 4-inch mini foam or microfiber rollers (buy several – swap them between coats)
- Screwdriver or drill with bits
- Painter’s tape, marker, and zip-top bags
- Drop cloths or builder’s paper
- Wood filler and a putty knife (for old hardware holes and dents)
- Nitrile gloves and a mask (deglosser demands them)
- Tack cloth or microfiber cloths
- Painter’s pyramids, or simple paper cups, to elevate doors
Budget check: expect $150–$300 total if you brush and roll. Compare that to $5,000+ for cabinet replacement. This is the best return-on-effort project in your entire house.
The 7 Pro Steps
Step 1: Remove Doors, Drawers, and Hardware – Then Label Everything

Unscrew every door and pull every drawer. Remove all knobs, pulls, and hinges.
Here’s the trick that makes the job much easier: number everything. Stick a piece of painter’s tape inside each hinge cutout, write a number on it, and write the matching number on tape inside the cabinet opening. Drop each door’s screws into a labeled zip-top bag. Cabinet doors look identical until you try to rehang twelve of them from memory. They are not identical. Hinges wear into their own positions, and mismatched doors sag and rub.
Empty the cabinets too. You want zero dishes catching dust or overspray.
Step 2: Degrease Like Your Finish Depends On It (It Does)

Kitchen cabinets wear an invisible coat of cooking grease, hand oils, and silicone from furniture polish. Paint will not stick to any of it. It beads, fisheyes, and peels within months.
Mix your degreaser per the label. Scrub every surface – doors, frames, drawer fronts – with a sponge. Hit the zones around handles and above the stove twice. Those areas carry ten times the grime. Rinse with clean water and a fresh cloth. Let everything dry completely.
Pro test: wipe a white cloth across a “clean” door. If it picks up any yellow or gray, clean again.
Step 3: Apply Liquid Deglosser – Your Sandpaper Replacement

Here is where you skip the sanding. Liquid deglosser (also called liquid sandpaper) chemically dulls the existing glossy finish so paint can bite into it. No dust, no aching arms, no orbital sander.
Put on nitrile gloves and a mask. Pour the deglosser into a bucket, saturate a lint-free rag, and wipe every surface you plan to paint. Work in one direction. Keep the surface wet for the dwell time on the label – usually a few minutes. Most deglossers need no rinsing.
Critical timing rule: most deglossers require you to paint within a specific window (often 10 minutes to a few hours) while the surface stays chemically “open.” Read your can. Degloss in batches you can paint the same session.
While the deglosser works, fill old hardware holes and dents with wood filler. Press it in with a putty knife, let it dry hard, and shave the excess flush with the knife edge no sandpaper needed if you apply it cleanly.
Step 4: Set Up Doors Flat and Protect the Kitchen

Lay every door flat on painter’s pyramids or upside-down paper cups in your garage or a spare room. Flat surfaces prevent drips and sags – the number one giveaway of an amateur job. Gravity is your enemy on vertical surfaces and your friend on horizontal ones.
Back in the kitchen, tape off the walls along the cabinet frames. Cover countertops and floors with drop cloths. Tape plastic over appliances. Ten minutes of taping saves an hour of scraping paint off your quartz.
Step 5: Paint the Backs of the Doors First

Always start with the door backs. Two reasons. First, you get a practice surface nobody will scrutinize. Second, when you flip the doors later, any pyramid marks land on the back, not the show face.
Load your brush and cut in the recessed panel edges and profile details first. Then immediately roll the flat areas with the foam roller while the brushed paint stays wet. Roll in one direction with light pressure. Finish each section with one feather-light pass of a nearly dry roller – pros call this “laying off” – to erase roller texture.
Thin coats win. Cabinet enamels self-level beautifully when applied thin. Glob it on and you get drips, wrinkles, and week-long tackiness. Two thin coats always beat one thick coat.
Paint the cabinet frames in the kitchen during the same session. Work top to bottom, inside edges first, then face frames.
Step 6: Second Coat, Flip, Then Two Coats on the Fronts

Follow the drying time listed on the paint can. Most paints need 4 to 6 hours before you apply the next coat. Apply the second coat to the backs the same way: brush the details, roll the flats, lay off.
Now stop. Let the backs dry overnight before flipping. Flip too early and the pyramids will imprint dimples into soft paint. You will hate yourself at the finish line.
Next morning, flip every door and repeat: first coat on the fronts, proper recoat wait, second coat. The fronts get your best work – good light, fresh roller, patient strokes. Give the frames their second coat too.
Step 7: Wait 48 Hours, Rehang, and Respect the Cure

Here is where most DIYers blow an otherwise perfect job. Dry is not cured. Paint feels dry to the touch in hours. It reaches full hardness over 2 to 4 weeks, depending on the formula.
My schedule, non-negotiable:
- 48 hours minimum before rehanging doors. Longer is better.
- Rehang using your numbered tape system. Reattach hardware, or upgrade it – new pulls cost little and multiply the “new kitchen” effect.
- Stick small felt or clear rubber bumpers on door corners so doors never slam paint-against-paint.
- For the first 2 weeks: close doors gently, skip harsh cleaning, and wipe spills with a barely damp cloth only.
Baby the finish for two weeks and it will shrug off daily abuse for a decade.
Realistic Project Timeline
| Day | Task | Active Time |
| Friday evening | Remove, label, degrease, degloss, fill holes | 3–4 hours |
| Saturday | Backs: coat 1 + coat 2; frames: coat 1 | 3–4 hours |
| Sunday | Flip doors; fronts: coat 1 + coat 2; frames: coat 2 | 3–4 hours |
| Tuesday or later | Rehang doors, install hardware | 1–2 hours |
The 5 Mistakes That Ruin Cabinet Paint Jobs
- Skipping the degrease step. Deglosser is not a degreaser. Grease first, gloss second. Do both.
- Using wall paint. It never cures hard. Your cabinets will feel sticky in humidity forever. Use cabinet enamel only.
- Thick coats. They drip, wrinkle, and stay soft. Thin and patient wins.
- Flipping doors too soon. Overnight minimum between sides.
- Loading dishes and slamming doors on day two. Two-week cure. Set a phone reminder.
Frequently Asked Questions
Does the no-sand method really last?
Yes – on sound existing finishes. The deglosser-plus-bonding-enamel combination holds up as long as a scuff-sanded job, provided you degrease properly and use true cabinet paint. If your existing finish is flaking or peeling, no shortcut saves it; strip or sand those areas first.
Do I need a primer at all?
Not on solid wood, MDF, or previously painted cabinets in good shape when you use a self-priming bonding cabinet enamel. Two exceptions: very glossy laminate (spot-test adhesion first; use a bonding primer if the test coat scratches off with a fingernail after 3 days) and dramatic dark-to-white color changes, where one tinted primer coat saves you a third coat of expensive paint.
How much paint do I need?
One gallon handles roughly 30 doors and drawer fronts plus frames with two coats. Buy a quart extra for touch-ups in the same batch.
Brush and roller, or sprayer?
A sprayer gives the smoothest finish but demands hours of masking and real technique. For a first project, the brush-plus-foam-roller method delivers 90% of the result with 10% of the risk. Modern self-leveling enamels erase most brush marks on their own.
Can I paint over cabinets painted before 1978?
Test for lead first with an inexpensive kit. If lead is present, do not disturb the surface – call a certified professional.
What colors add home value?
Muted greens, warm whites, and deep navy currently top buyer preferences. Loud, saturated colors date fast and can shrink perceived value.
Final Word From the Field
Painting kitchen cabinets is not hard. It is a discipline of sequence and patience. Degrease honestly. Degloss thoroughly. Match the paint to your material. Apply thin coats. Then step back and let chemistry finish the job you started.
Do those things, and the transformation will stop you in your tracks every time you walk into the kitchen. Now go number those doors.